Power Apps - How to delete checked items in a gallery
Using checkboxes to delete multiple list items in Power Apps Canvas


Table of contents
How to delete items with checkboxes
If you have a gallery of items, and you want the user to be able to delete multiple items by checking of checkboxes by pressing a single button. We can accomplish this by pushing id's to a Collection, a variable that contains an array/table.
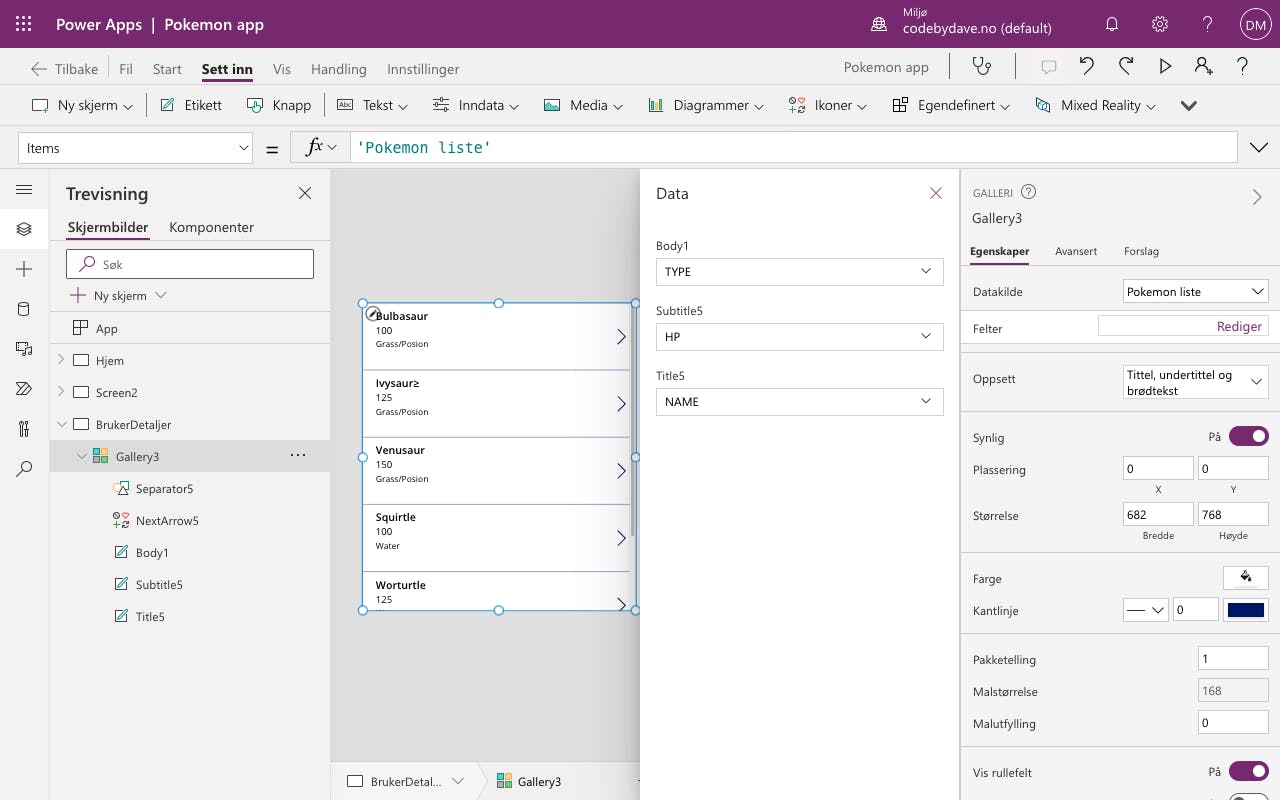
Step 1 - Create a gallery
First, create a gallery. The data could be whatever you want, but preferably the items contains their unique id.
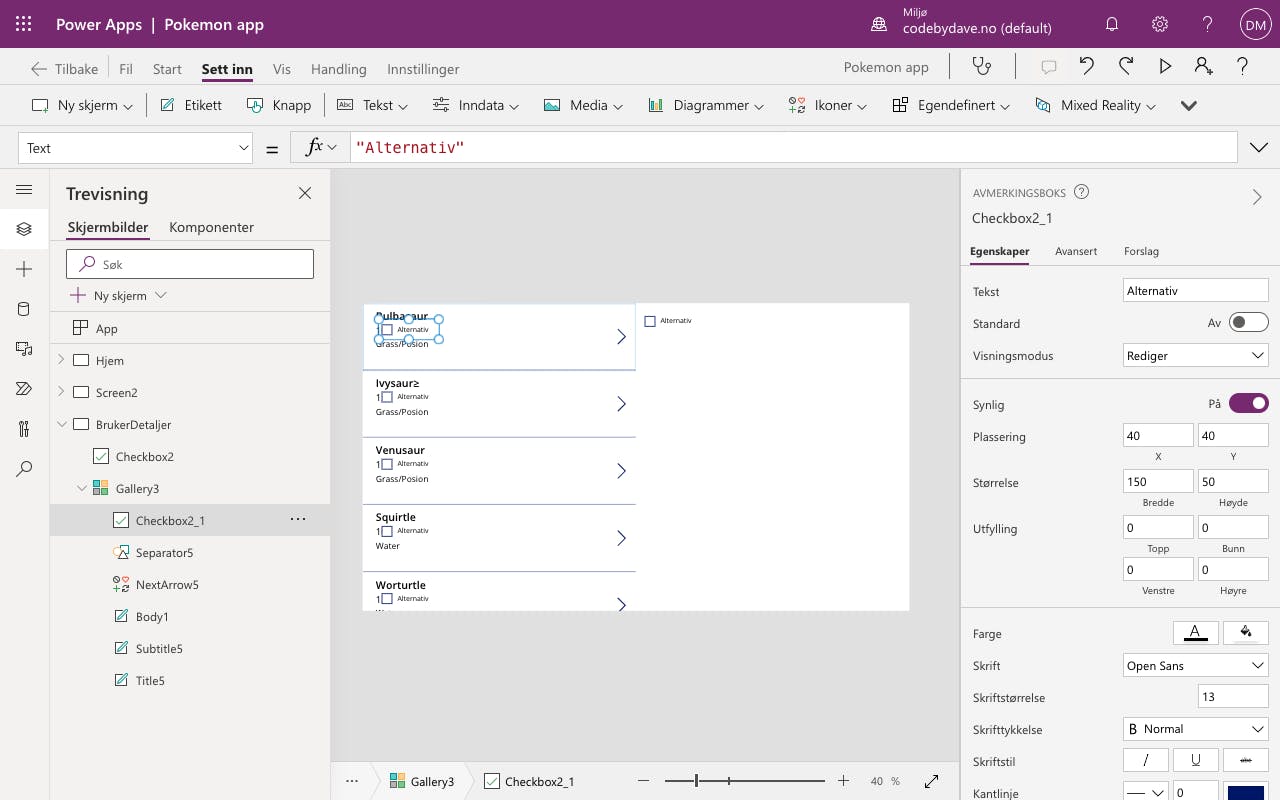
Step 2 - Add checkboxes to all gallery items.
Then, add a checkbox to each gallery items. This can be done by adding a checkbox icon to the screen. Does not matter were on the screen it's added. Then, in the panel on the left side, copy the Checkbox Icon. Then, paste the item in the inside the Gallery control in the same panel.
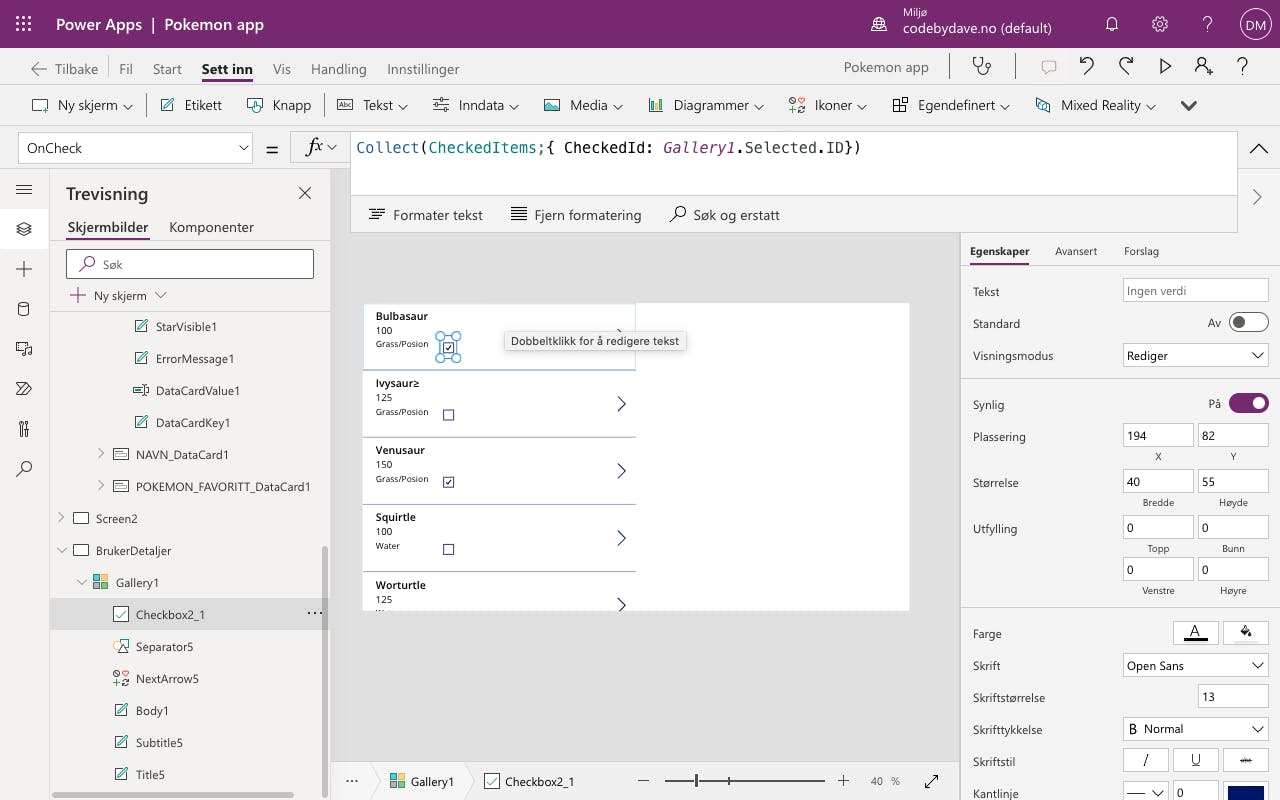
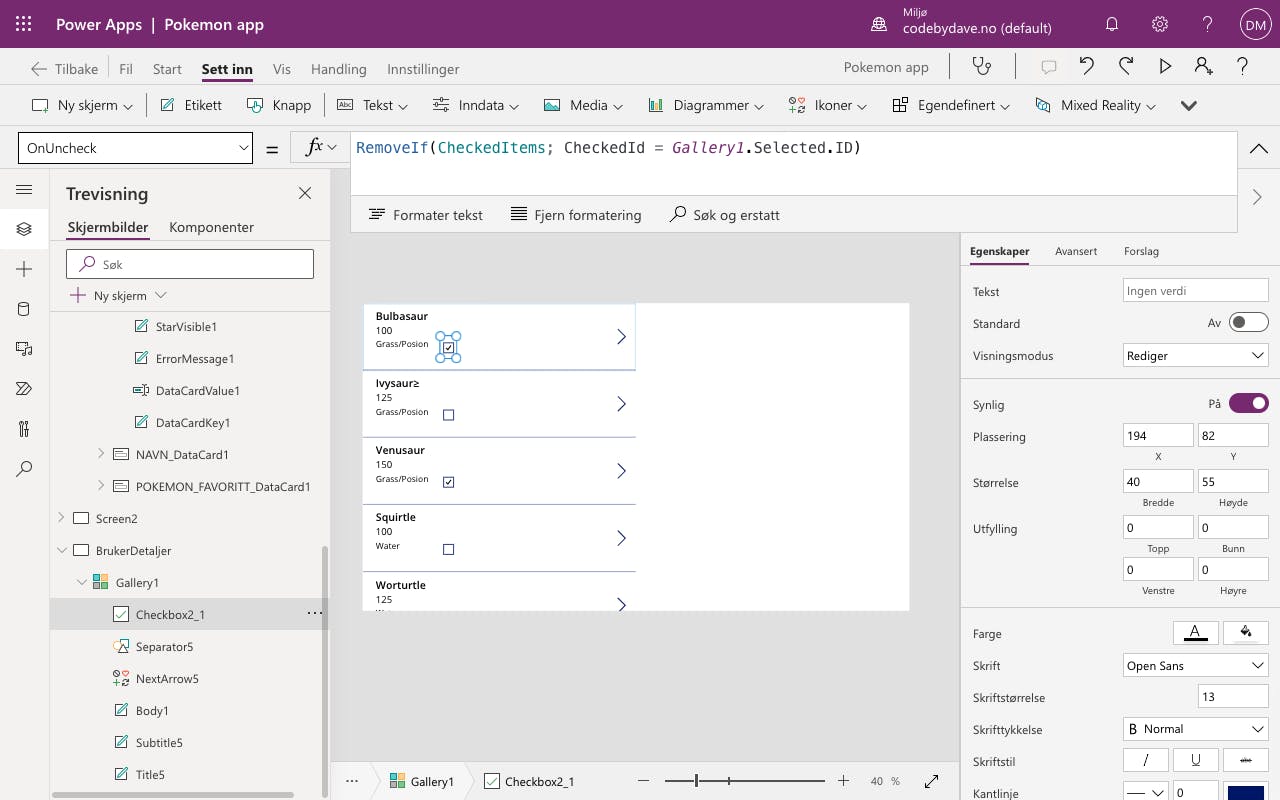
Step 3 - Create a Collection in the "OnCheck" property
Select the Checkbox icon, and on the property "OnCheck", write this line:
Collect(CheckedItems;{ CheckedId: Gallery1.Selected.ID})
Breakdown:
Collect() - Create or updates a Collection variable. Here we will store the checked items id. This takes two parameters.
CheckedItems, is the first parameter. This is the name of the Collection. Since there were no Collections with the name CheckedItems, a new one was created.
{ CheckedId: Gallery1 .Selected .ID } is the object/data, which will be pushed to the end of the Collection. Gallery1 is the name of the Gallery control. Selected is the current selected item, and ID is the Id preperty of the item (if the item dont have an Id, you could use another property like Name).
Now everytime a checkbox is checked of, the id of the item will be sent to the collection.
Step 4 - Remove items when UnChecked
Next step is to remove the id of an item when a checkbox is unchecked. Write this on the property "OnUnCheck":
RemoveIf(CheckedItems; CheckedId = Gallery1.Selected.ID)
Breakdown:
- RemoveIf - This function loop over a datasource, and removes something if a certain criteria is met. This takes two parameters. The first is the datasource, which in this case is our Collection CheckedItems. The second is the condition. If the condition returns true, the item/items will be removed.
- CheckedItems, the first parameter. This is the datasource we will loop throuhg and possibly remove from.
- CheckedId = Gallery1 .Selected .ID - This is the condition. The "CheckedId" is the property of the current item in the loop inside CheckedItems. If this id is the same as the Gallery1. Selected. ID, then we can remove it. If it does not exist, then there is nothing to remove.
Step 5 - Delete checked items with the "OnSelect" on a button
Last step is adding a button and writing this on the property "OnSelect":
RemoveIf(Users; ID = LookUp(CheckedItems; CheckedId = ID; CheckedId))
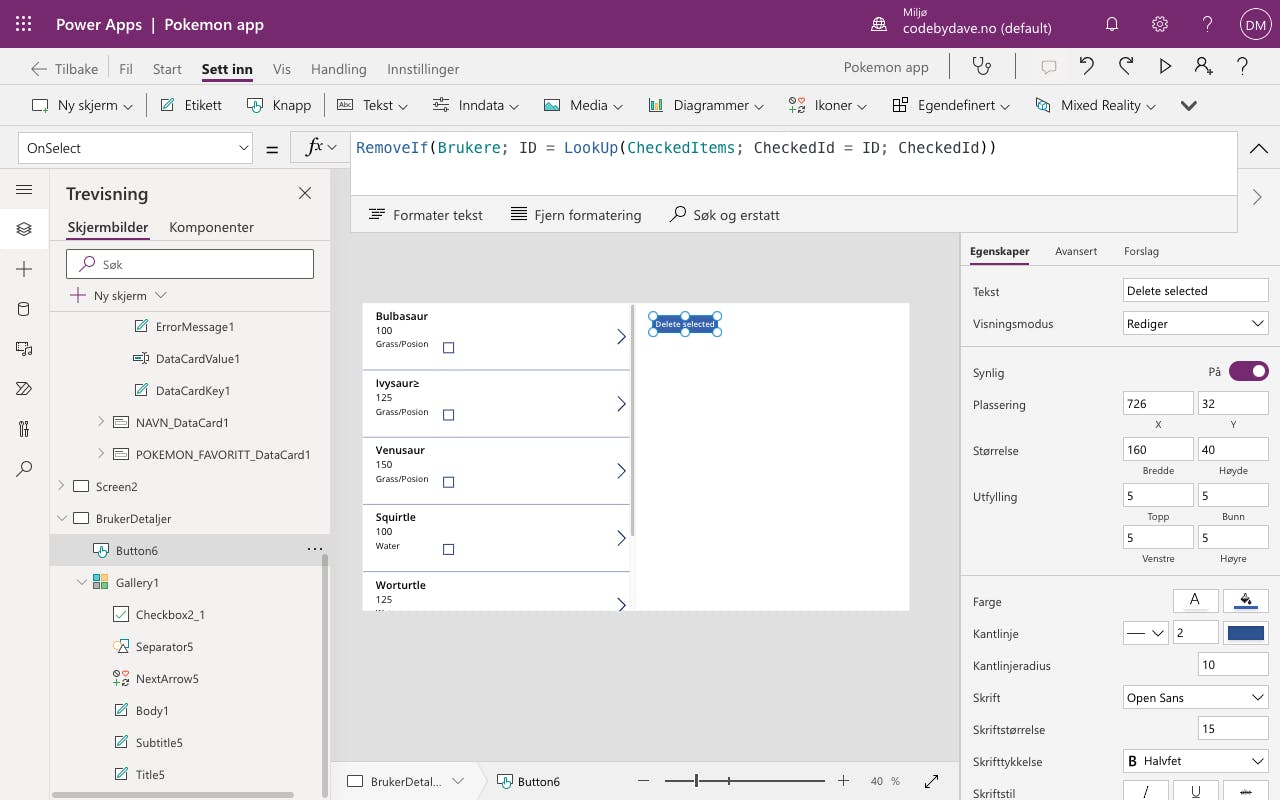
Breakdown:
- RemoveIf - Same as we used on the "OnUnCheck" property. But this time, we will remove a user from the actual datasource (Excel in this case).
- Users - This is the name of the data we got from Excel. We will delete all the users which have been checked of.
- ID = LookUp(CheckedItems; CheckedId = ID; CheckedId) - This looks long and scary, but it's not that complicated when you break it down. This is a condition to check if two value are the same. So in this example, if "ID" is the same as "LookUp(CheckedItems; CheckedId = ID; CheckedId)". If they are the same, that means that the Id in the CheckedItems are also in the Users list, and we can delete that user. Let's break it down:
- ID, is the ID property of the current user in the loop.
- LookUp() - This is a function that searches through an datasource/list to look for a specific item, and returns that item/value.
- CheckedItems is the list we are searching trough. We are looking to see if the user id is inside CheckedItems.
- CheckedId = ID - This is a condition to check If the CheckedId is the same as ID.
- CheckedId, this is what we return if the condition above is met.
That's it. Now you can delete items that have been checked of, with one single click.
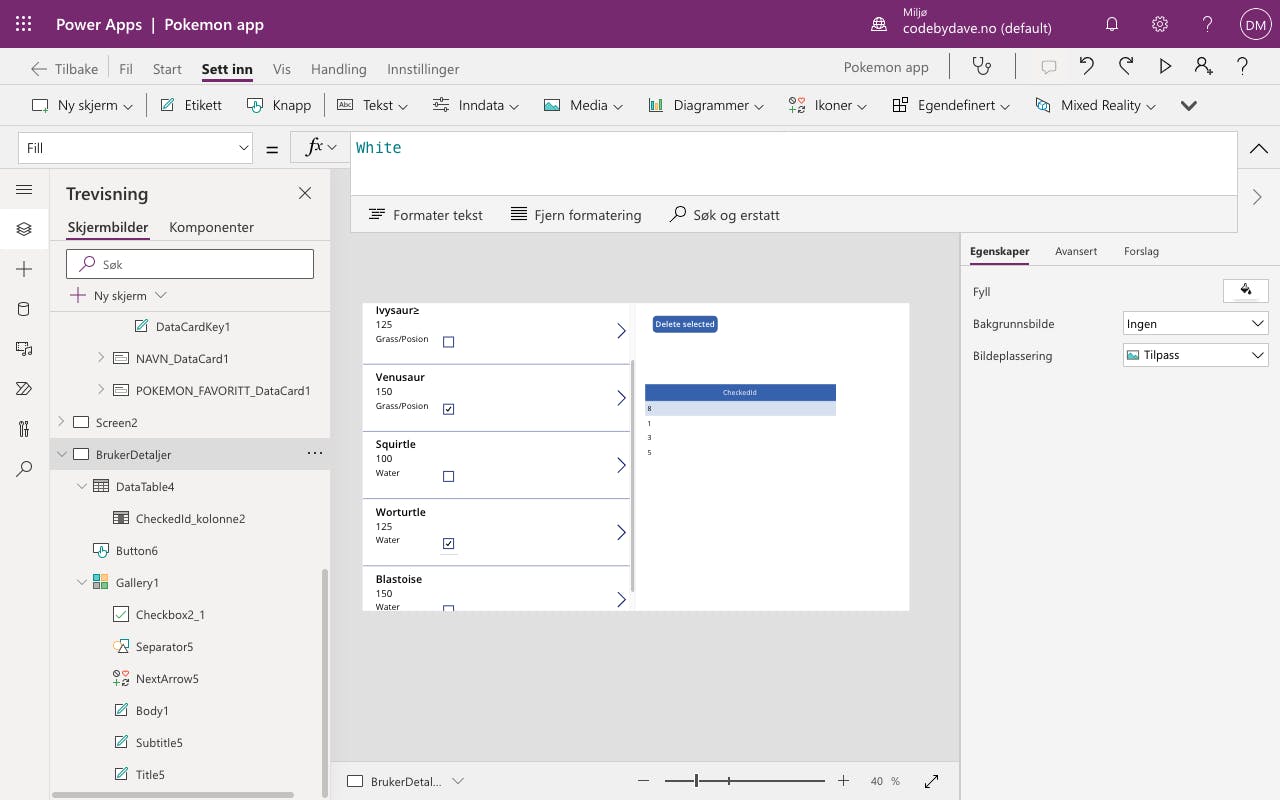
Bonus step - Add a datatable with the CheckedItems data
If this was hard to understand, you should do this as well to see what's going on. Add a datatable and give it the CheckedItems Collection data. Now, you can see live when you check and uncheck a checkbox, and which values are inside.